Jimami Tofu Recipe: How to Make Okinawan Peanut Tofu

Jimami tofu (peanut tofu) with Sweetened Soy Sauce

I first had jimami tofu (peanut tofu) when traveling in Mei Prefecture in Japan. Locals invited us over for a delicious breakfast consisting of miso soup, steamed rice, mango, kurobuta sausage, sweet Japanese omelet, pickled plums in honey, jimami tofu, and green tea. The tofu was unlike any other tofu I’ve ever had, bursting with peanut flavor in a sweet, savory sauce. At first, I assumed the sauce gave it the peanut flavor—since tofu usually takes on the flavor of the ingredients it’s paired with. Later, I found out that jimami tofu isn’t actually tofu—since it’s not made with soybeans; rather, it’s made from peanuts! It’s called tofu because it looks and feels like tofu.    read more

Cook Filipino Yellow Chicken Adobo with Turmeric and Coconut Milk

Filipino Yellow Chicken Adobo with Turmeric and Coconut Milk

Filipino Yellow Chicken Adobo with Turmeric and Coconut Milk

Yellow chicken adobo is a classic Filipino dish that’s sweet and sour, luscious and creamy. It’s the perfect comfort food—warm, hearty, and full of flavor. Adobo is the Spanish word for marinade, but in this context refers to a specific style of cooking developed in the Philippines, where meat and/or vegetables are slowly cooked in a vinegar-based sauce. Originally, this served as a preservation technique; the acidic vinegar saturates the food, prolonging the time you can safely eat it.

Toasted Ground Turmeric—What Gives Yellow Adobo its Distinctive Color

Toasted Ground Turmeric—What Gives Yellow Adobo its Distinctive Color

This yellow adobo is made with bay leaves, black peppercorns, turmeric, onion, shallots, garlic, ginger, red pepper flakes, coconut milk, sugarcane vinegar, and honey. The ground turmeric gives the adobo its vibrant yellow hue. Coconuts are a common ingredient in Filipino cooking and feature heavily in the dish, both in the sauce and as a topping. Coconut milk adds richness to the sauce, while burnt shredded coconut adds a smoky-bitterness. Sugarcane vinegar, a distinctive Filipino ingredient, gives the dish a sour kick. The spicy, sweet, sour and bitter flavors interact and combine to create an intensely flavorful stew.

Prepped Ingredients for Cooking Filipino Yellow Chicken Adobo

Prepped Ingredients for Cooking Filipino Yellow Chicken Adobo

Cooking this yellow chicken adobo takes time and effort—you need to prep the ingredients, toast the turmeric and shredded coconut, make the adobo sauce, roast the vegetables, grill the chicken and slowly simmer it in the adobo sauce. However, once you taste it, you’ll know all your hard work was worth it. The chicken is fall-off-the-bone tender and adobo sauce is incredible. I’ve made it countless times and it’s always a favorite!

Have you made adobo before? What’s your favorite Filipino adobo?

If you enjoyed reading this post, like my Facebook page and subscribe to my blog to follow my cooking adventures and flavorful journeys!

Salmon with Lemon-Dill Butter Sauce and Capers

Salmon with Lemon-Dill Butter Sauce and Capers

Salmon with Lemon-Dill Butter Sauce and Capers, Garlic-Roasted Asparagus and Boiled New Potatoes

Sometimes you need a flavorful meal that’s quick and easy. This salmon with lemon-dill butter sauce and capers is just that! Recently, Corey and I moved from Chicago to Atlanta; while exciting, it was also exhausting.

Despite a weekend of driving across the country, unloading and unpacking boxes, and setting up a new apartment, I was determined to break in my new kitchen with a home-cooked meal. To find a quick recipe, I turned to the Splendid Table’s Weeknight Kitchen (an excellent resource for busy cooks). This delicious salmon recipe is one-pot meal that only uses 5 ingredients (not including salt and pepper).

One of my favorite parts of this dish is the crispy salmon skin, which absorbs butter and imparts extra flavor. If you’re not a fan of salmon skin, it’s probably because you’ve had limp, soggy skin, which is admittedly quite dreadful.

The trick to getting crispy salmon skin is a hot skillet and dry skin (pat down the salmon skin with paper towels before cooking, if necessary). Also, when you place the salmon into the hot skillet with the melted butter, make sure to place it skin-side down and do not flip or move it for 3-4 minutes. You can gently press the filets to ensure the skin fully contacts the pan.

The ingredients in this recipe work well together. The lemon adds acidity, the capers provide saltiness, the butter and oily salmon impart richness, and the dill freshens everything up. It’s a vibrant, simple, and wholly satisfying meal!

This salmon goes great with just about anything. I like to serve it with garlic-roasted asparagus and boiled new potatoes tossed in a Dijon vinaigrette, but you can also serve it with a side salad, rice, or a baked potato.

Enjoy this salmon meal on a busy weeknight!

If you enjoyed reading this post, like my Facebook page and subscribe to my blog to follow my cooking adventures and flavorful journeys!

Spicy Harissa Hummus

Spicy Harissa Hummus

Spicy Harissa Hummus with Olives and Homemade Pitas

I’ve been a fan of harissa ever since my honeymoon in France where we ate Moroccan olives flavored with the Tunisian chili paste. I love how it spices up a dish and gives it a nice, smoky flavor. Today I made a spicy harissa hummus drizzled with olive oil and sprinkled with chili flakes. It was amazing!

Lately, I’ve been making more of an effort to incorporate beans into my diet and hummus is a great way to do this. It’s perfect for snacking and is a wonderful way to transform chickpeas into a delicious dip. You can serve it with celery, carrots, fresh pitas, pita chips, or any other tasty chip or vegetable.

This spicy harissa hummus is really easy to make, especially if you use canned chickpeas. Just put all the ingredients in a food processor, blend and serve; make sure to drizzle a little olive oil over the top and garnish with chickpeas and chili flakes, if desired.

If you make the harissa from scratch, it will take a little more time because you have to rehydrate the peppers, remove the seeds and stems and make it into a paste with garlic, olive oil, salt, and spices. However, it’s worth the extra effort, especially if you don’t have an easily available source of harissa. Making it yourself also allows you to control the spiciness and yields extra, so you’ll have it around for future batches of hummus, as a sauce over eggs, as a spread, or for Moroccan olives.

Spicy Harissa Hummus Drizzled with Olive Oil

Spicy Harissa Hummus Topped with Olive Oil, Chickpeas and Chili Flakes

I hope you enjoy this spicy harissa hummus and if you want another hummus recipe (you can never have too many), check out my recipe for red pepper hummus—it was one of my first blog posts on Flavorful Journeys! If you have a favorite type of hummus, let me know in the comments.

If you enjoyed reading this post, like my Facebook page and subscribe to my blog to follow my cooking adventures and flavorful journeys!

Thai Chicken Satay with Peanut Sauce

Thai Chicken Satay with Peanut Sauce

Thai Chicken Satay with Peanut Sauce

Thai chicken satay is one of my absolute favorites! After grilling or broiling these strips of well-marinated chicken, the resulting dish is smoky, moist, and delicious. The peanut sauce only adds another dimension to this complex and satisfying meal.

The key to great Thai chicken satay is marinating the meat for several hours using a sweet, salty, and spicy marinade. (Spicy in the sense of flavorful, not hot.)

The marinade consists of lemongrass, shallots, garlic, red chilies, ginger, turmeric, coriander, cumin, soy and fish sauces, brown sugar, and vegetable oil. This is quite the panoply of ingredients, but trust me, the result is worth it!

Almost all of these ingredients can be found at your regular grocery store, though the lemongrass might require visiting an Asian market. I highly recommend doing so if necessary, however, because lemongrass has a unique flavor profile, preventing easy substitution.

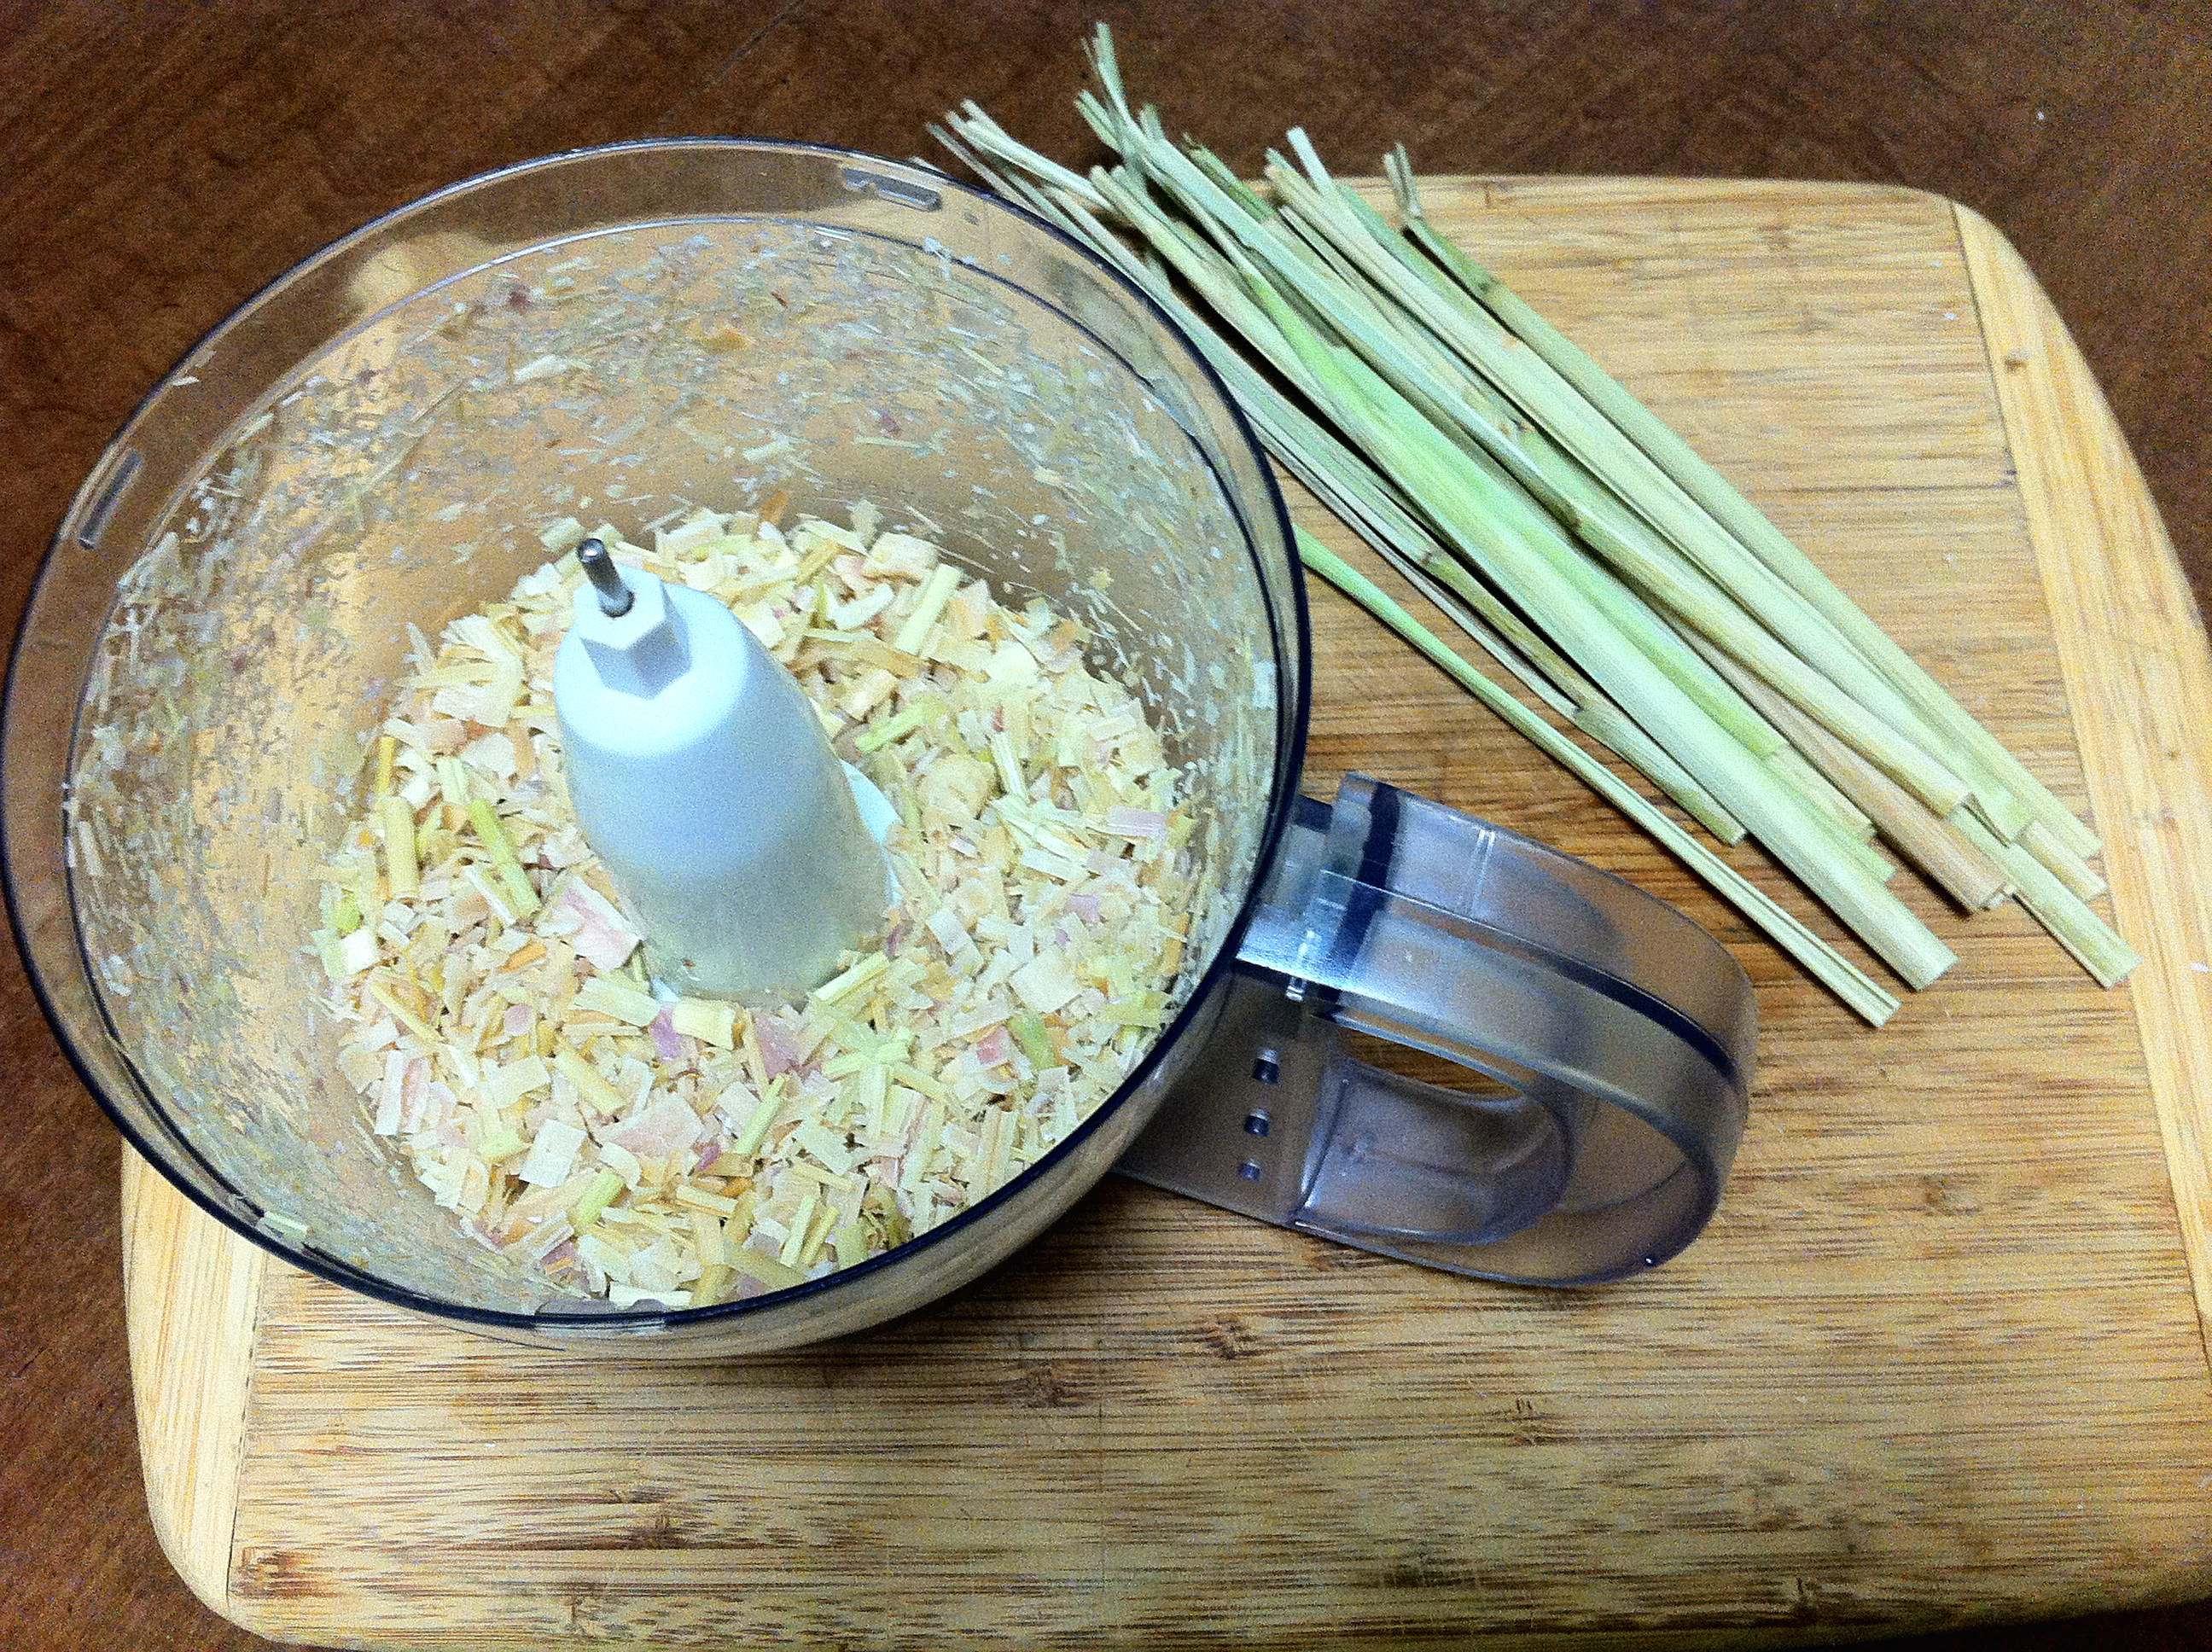
How to prepare lemongrass: Remove the upper third of the stalk (reserve for later use in stocks or soups if desired) and the outer leaves (discard). Cut the rooty bottom off the stalk and discard. Then slice the lemongrass and run it through a food processor until finely chopped.

outer leaves, lemongrass stalk, chopped lemongrass, lemongrass upper stalks

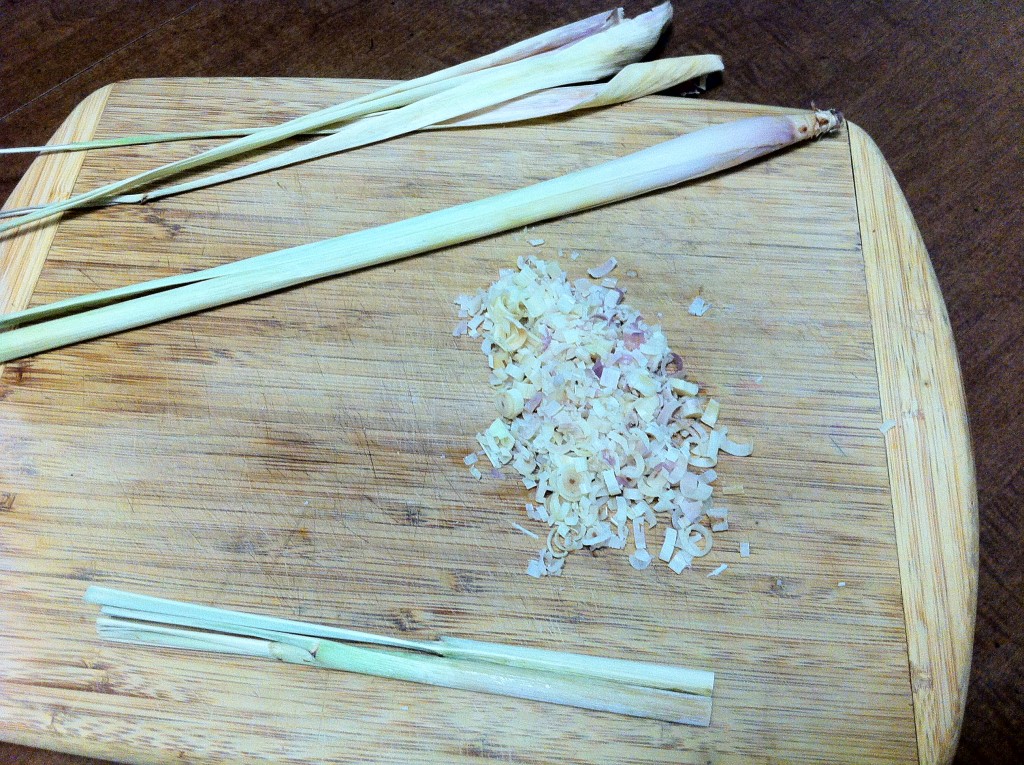
Top to Bottom: Outer Lemongrass Leaves, Whole Stalk, Chopped Product, Upper Stalks

Chopped Lemongrass in Food Processor

Chopped Lemongrass in Food Processor, Upper Stalks Reserved for Later Use

I like to start marinating my chicken the night before or the morning of–longer marinade times enhance the flavor. If you’re rushed, marinate it for at least 1-2 hours.

I’ve made this Thai chicken satay many times, and either grilling or broiling works just fine. I personally prefer grilling, which creates char marks and imparts a nice smoky flavor. On the other hand, broiling is usually faster and cleaner, and broiled chicken satay still tastes great.

Grilled Thai Chicken Satay with Homemade Peanut Sauce

Grilled Thai Chicken Satay with Homemade Peanut Sauce

Peanut sauce is an essential component of Thai chicken satay. Sometimes I make a fast-and-easy peanut sauce using peanut butter, but lately I’ve preferred an authentic Thai peanut sauce made from roasted peanuts. The latter is still relatively easy to prepare but utilizes more traditional Thai flavors, like fish sauce and coconut milk. Overall, it has a more complex flavor and a courser texture.

Thai Chicken Satay with Roasted Peanut Sauce

Thai Chicken Satay with Roasted Peanut Sauce

Thai chicken satay is great for a party. You can make it ahead of time and keep it in a warm oven until ready to serve. It’s a great finger food that guests will love–I’ve almost never had any leftovers. Serve it with Singha beer or Thai Iced Tea and enjoy!

If you enjoyed reading this post, like my Facebook page and subscribe to my blog to follow my cooking adventures and flavorful journeys!